Side Plank Benefits & Mistakes To Avoid
Side Plank Benefits – Step By Step Guide & Mistakes To Avoid
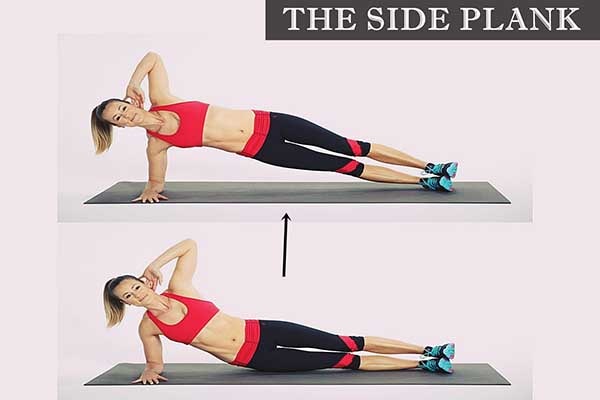
While doing most of the core exercises, we often forget to target our oblique muscles. The oblique muscles are located on both sides of our abdomen area i.e. from our lower ribs down to the pelvic area. These muscles help in the twisting and bending of our upper body. Moreover, these muscles are very essential for our lower back strength & preservation of our body posture. Thus, you need to keep your oblique muscles strong & toned. One of the best exercises for strengthening and toning of your oblique muscles is the side plank.
Side Plank Pose & It’s Benefits
As the name suggests, the side plank is a variation of the standard plank or the extended arms plank pose. Rather than emphasizing on just your belly, the side plank focuses more on your oblique muscles. Also, the side plank is more difficult to hold than all the other plank variations. This exercise not only helps to tone & strengthen your sides but also targets other areas of the body. The other targeted areas of this exercise include hips, quadriceps, arms, shoulders, chest, and hamstrings. To get all the benefits of this exercise and avoid injury, it’s very important to do this exercise the right way.
To help you better, we have created the step by step guide to do the side plank correctly.
Steps To Do The Side Plank Correctly
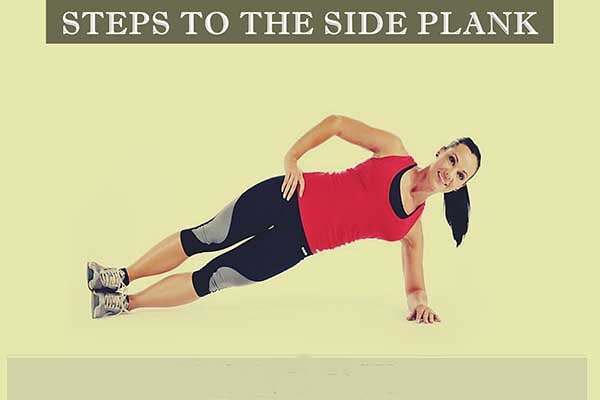
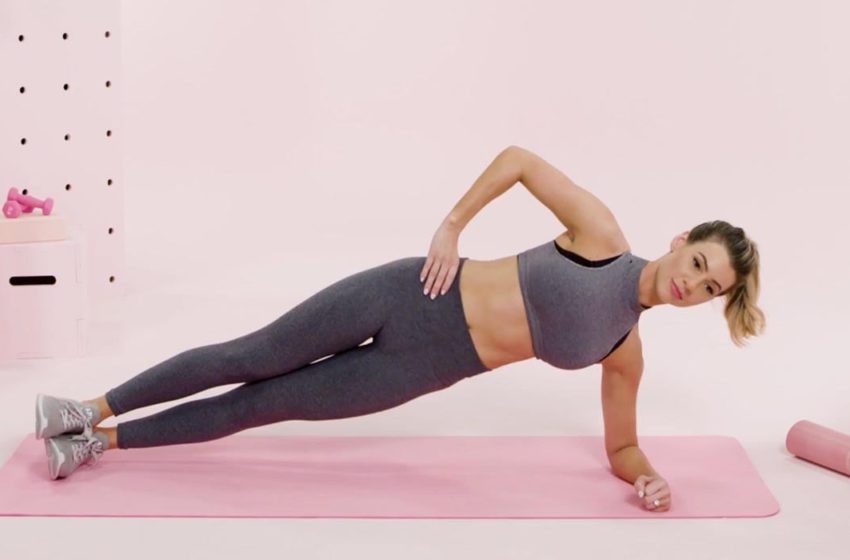
- Firstly, you need to lie down on the floor on your side with straight legs. Support your upper body by placing your left arm’s elbow bent right below your left shoulder. Also, your upper body and head need to be in a straight line. Your right arm can either rest on your body’s side or you can place your right hand on your waist by bending your elbow.
- While exhaling, you need to raise your hips & knees off the floor to form a straight line with your head, upper body, and legs. Make sure to keep your core area and abdominal muscles engaged by squeezing your belly inwards.
- Don’t let your body break the straight line and hold the position for at least 30 to 60 seconds.
- After that, you need to slowly lower your body back to the initial position while inhaling.
- Repeat all these steps 2-3 times on each side of the body.
Mistakes To Avoid
- Don’t Hold For Too Long – Many people have this myth that pushing the body beyond its limits can offer quick & better results. In reality, it causes more problems than benefits. Thus, it is recommended to hold the side plank pose for a few breaths and increase your hold-time as your strength increases with practice.
- Prevent Bending & Sagging – As the side plank pose is an intense workout, your hips, and lower body can often bend or sag downwards. Hence, it can affect the effectiveness of this exercise negatively. Furthermore, if you push your body too much, it can even lead to injury & back issues.
- Avoid Instability – When you don’t have enough arm strength, you may not be able to hold the side plank pose for long. Either your body will start rolling forward or your lower body will start sinking towards the floor. This way you will not be able to maintain a straight line with your body and the chances of the back problems might increase. Thus, it is recommended to do strength-building exercises before starting the side plank pose.
That’s all folks!
So these were the top benefits and the step by step guide to do the side plank pose in the right way. Make sure to follow these steps & precautions to get the best results and to avoid injuries. A combination of a healthy diet and strength-building exercises can improve & speed up the results of this pose. For queries or suggestions, feel free to comment below or contact us through email.
